Preparing your Roses for Winter
Preparing your Roses for Winter
 East Idaho winters can be as long and cold for roses as they are for people. And while some varieties (hardy shrub roses and Knockout types) require no special care to get them through the winter, more tender types like hybrid teas often don’t survive the winter without some special care in the fall before temperatures fall into the teens.
Spring
Winter protection for hybrid tea roses actually starts at planting time. While the directions on the pot, or in gardening books may say to plant the rose with the bud union (the swollen area at the base of the plant where the canes emerge) above ground level, in cold climates like ours that is not true. It is important that the bud union be planted about 2” below ground level. In severe winters the rose canes will often die to near ground level. If the bud union is above ground it may die also, leaving the plant to send canes up from the rootstock, which will have very poor flowers, if they bloom at all. If your roses weren’t planted properly you have even more reason to be sure they are mulched heavily for the winter.
Summer
 Keeping your roses healthy all summer long will help ensure that the plants enter into the winter in top condition. Keep the blossoms pruned as they fade to encourage continued blooming. Be vigilant and proactive to keep insects and diseases at bay. Feed and water regularly through the summer, but quit feeding your roses by the end of July. This will help them slow their growth and begin hardening off for winter.
Fall
Of course fall is the most crucial time to prepare your roses for winter. Discontinue deadheading (clipping the blossoms from your roses) in mid September. Leave the hips (seed heads) that form in place of the flowers. This encourages the plant to move into the next life cycle which is to produce seed and begin to go dormant for winter. Watering can also be reduced. Not enough to stress the plant, but enough to slow the growth and discourage young tender growth in late fall.
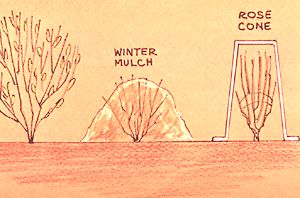
Around Halloween get your roses put to bed for the winter. First, water them deeply to make sure they have plenty of moisture to hold them through the winter. Then mulch them heavily at the base of the plant. Your only concern is to keep the bottom 6 inches of the canes alive through the winter. And you do that by mulching them heavily at the base.

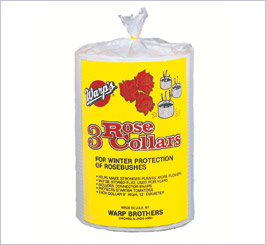
 You can also simply mound soil and mulch around the base of the rose, but I prefer to use Warps Rose Collars and fill them with Soil Pep (bark dust). This method is quick and easy and it looks nice and tidy. The rose collars typically come in a pack of three. Simply remove them from the package, form a cylinder around the base of the rose, press the little tabs into the pre-punched holes to connect the cylinder together, and fill up with Soil Pep. If you have an extra large bushy rose you can connect two collars together to make a wider cylinder. Leaves, straw, compost, and other mulches can be used, but I prefer the ease of use, and tidy look of the Soil Pep. And then next spring I simply rake it out into the entire bed for an attractive mulch for the summer.
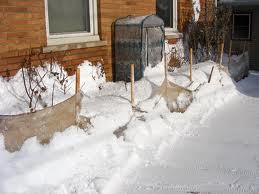
There are as many methods to protect roses in the winter as there are gardeners. Some people use straw bales. Others use Styrofoam rose cones or stakes and burlap. And still other use nursery pots with the bottoms cut out to form a cylinder around the rose and fill them with mulch. I just find the Warps rose collars to be the simplest and most attractive. They are inexpensive and last for years.
You’ll want to wait until spring to prune your roses. If they are too tall I will sometimes prune them down to 2 or 3 feet so they aren’t so unsightly. But you are going to be pruning them down to about 8” in the spring anyway, so you really don’t care if the tops of the canes are killed. And my experience has been that the further back you prune the roses, the further back they die in the winter.


